
get the dust out before before it damages your computer!…
© 2014 by KV5R. Rev. 3/23/2014.
Introduction
We all tend to overlook it: dust! It builds up slowly and we don’t notice it unless we’re really looking for it. It’s likely that many strange computer hardware failures are due to dust. It does two bad things: (1) it blocks cooling air flow, and (2) it can absorb moisture and condensation and become conductive, shorting out power supply components or static-zapping sensitive IC chips. I have looked at dust under the microscope, and was surprised to see all the different things in common house dust—microscopic silicates (sand), hair, epidermal cells, and a plethora of insect parts—anything and everything small enough to float on the air. And it’s all bound to surfaces by static charges, cooking oils, and perhaps tars from cigarette smoke.
How To
If you’ve never cleaned a computer before, you may be of the type that doesn’t like to open electronics, being afraid of damage or just not knowing how or what to do. But anyone can clean electronics, and everyone should, if you expect them last. Anything with a fan in it should be cleaned at least one or twice per year. All you need is a Phillips screwdriver, a pipe cleaner (the type with stiff bristles is best), and an air compressor with an air nozzle.
I recently cleaned my computer, and took some pictures to help others see how easy—and how necessary— it really is. I hope this will give you the confidence and incentive to clean your computer, before you have an expensive dust-related failure.
Note: When using an air compressor on a computer, remember:
- Only use an oil-less type air compressor, and make sure it doesn’t have a tool oiler in-line.
- Do NOT get the air nozzle very close to IC chips—stay several inches away—as the high-speed stream of air may create a static charge that might blow a chip!
- Keep one hand on the nozzle and the other on the metal computer case to help equalize any static charges.
- A humid morning is much safer than a dry afternoon.
- It’s okay to get real close to grilles, heat-sinks, and fans, but don’t over-speed the fans (see below).
- Don’t let the metal tip of the nozzle hit anything, particularly spinning fan blades!
- Canned air: never tried it, but I can imagine that it’s too expensive, and doesn’t provide the volume of air flow needed to to really un-stick dust and get it moving.
Pictures
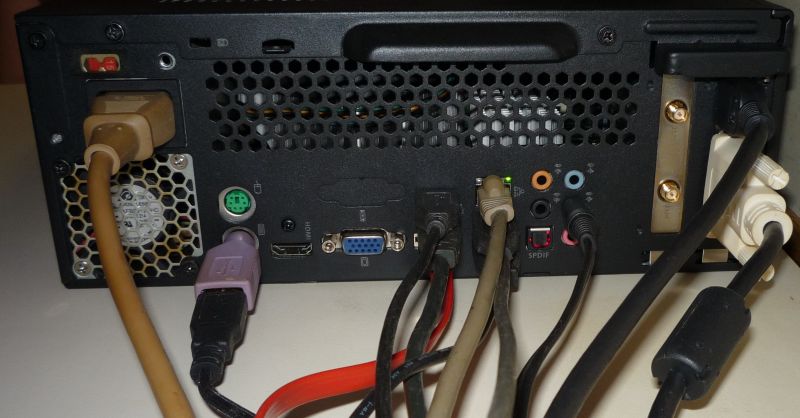
If you’re not sure where all those cords go, just take (and print) a picture first. Then remove all the cables, remove the cover, and have a look.

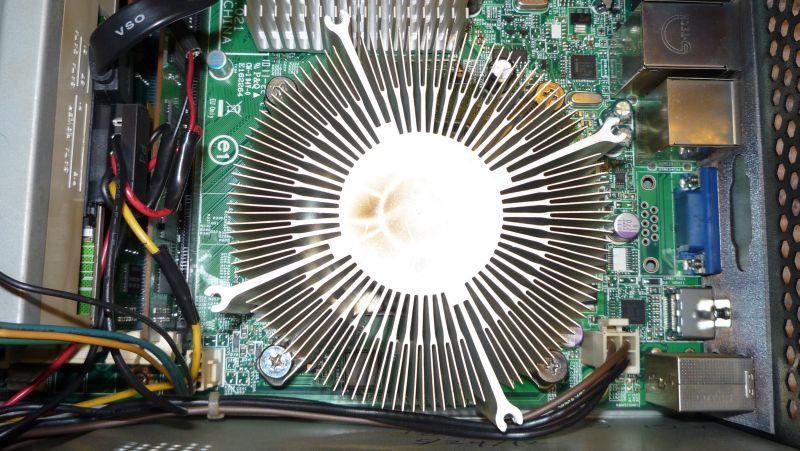
The processor fan and heat-sink are loaded with dust. This is about a year’s worth—way too much!
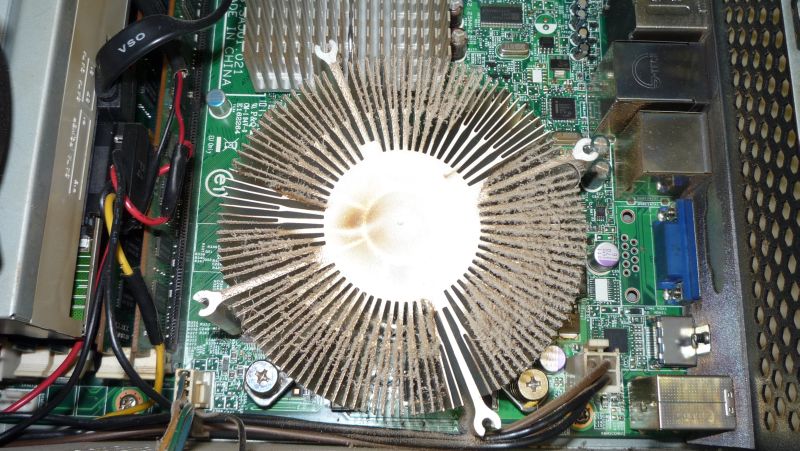
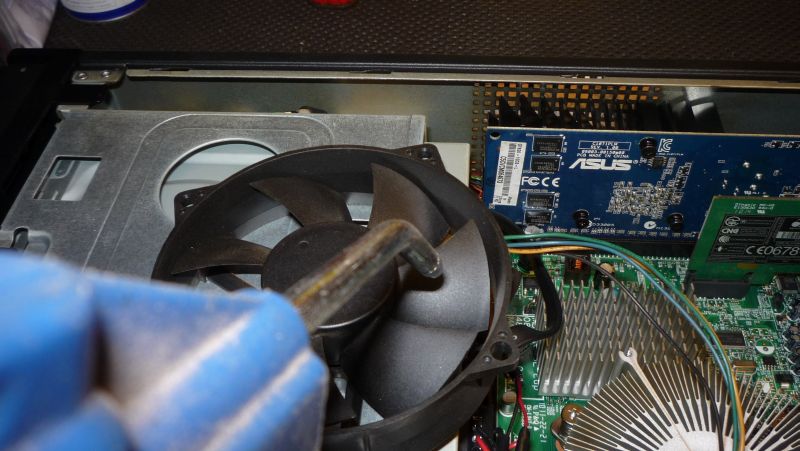
Using a magnetic screwdriver (so you don’t drop a screw into the computer), remove the 4 screws holding the processor fan and lay it aside. It is not necessary to unplug it. This is the typical Intel radial heat-sink. It’s dangerously (and embarrassingly) loaded with dust. If you have an AMD processor, your heat-sink will be square, with a bunch of parallel vertical fins.
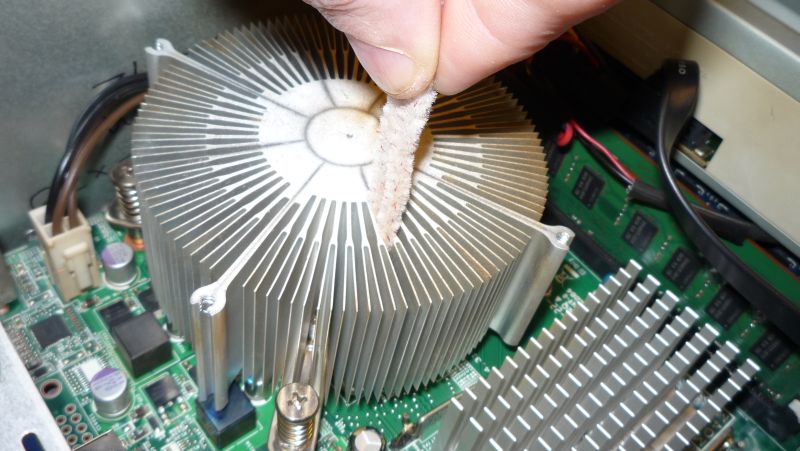
Take the computer out to your garage or workshop and use the air compressor to blast out the heat-sink. Then scrub between each pair of fins with a bristle-type pipe-cleaner, bent into a U-shape. Push the U all the way through, work it up and down between the fins.
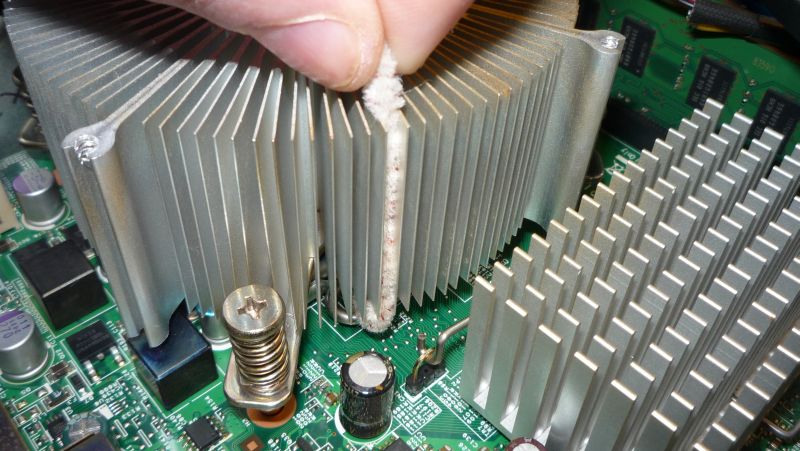
Air blasting isn’t enough; it will blow away the big stuff, but fine dust will stay attached until you scrub it loose. This takes a while, but just take your time and scrub between each set of fins. Then blast again with the air compressor nozzle.
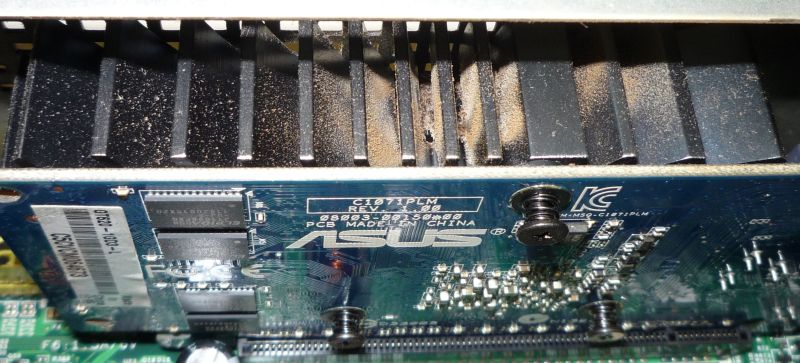
Processor heat-sink after cleaning—much better!
Video cards with fans are particularly prone to dust-related overheating.
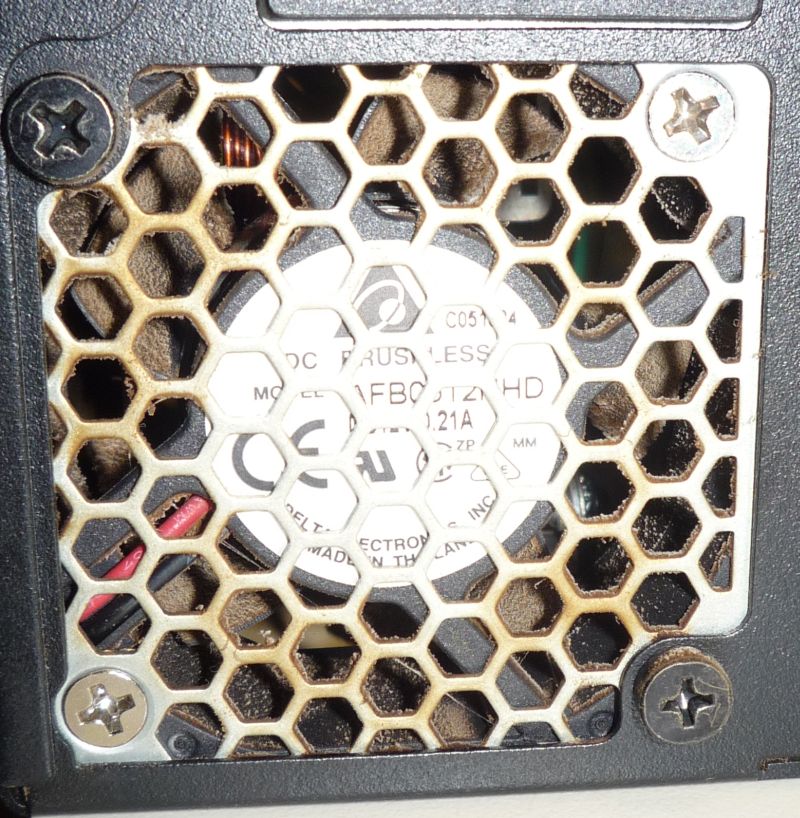
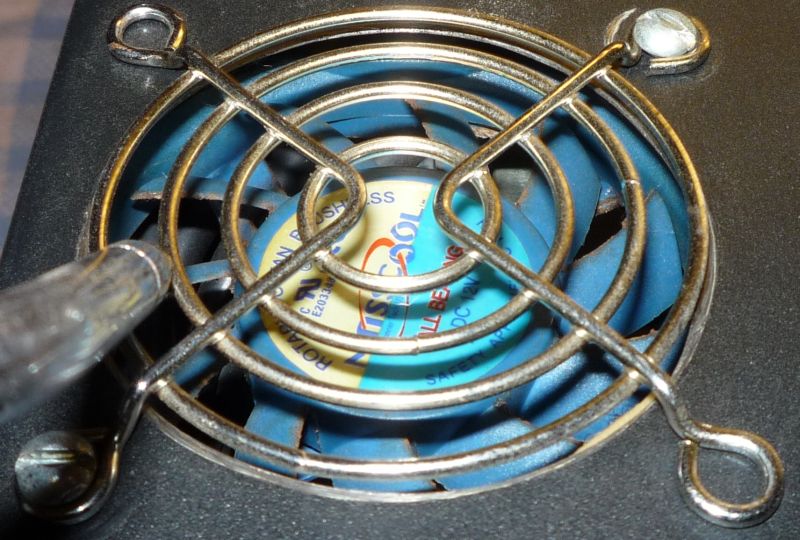
This power supply fan is a disaster waiting to happen! Note that it isn’t blocked, but that the blades are so dusty that they cannot move the proper amount of air. Also, dust on the fan blades cause aerodynamic drag that overloads the fan motor, making it prematurely fail. If it fails and you don’t know it, the power supply will fail soon thereafter.
This is a fan I added a couple years ago to cool the hard drive. Not very efficient in that condition! Yuck!
When cleaning fans, do NOT simply blow against the blades like this—you’ll over-speed the fan, and you risk a blade hitting the nozzle, which will break the blade and you’ll have to buy a new fan (and be without your computer ’til the new fan comes in).

Blow parallel to the blades, like this…
…and this. Blowing parallel to the blades (1) cleans the leading-edges better, (2) doesn’t spin the fan so fast, and (3) has the blades moving away from the nozzle, so that if they strike the nozzle, are much less likely to break.
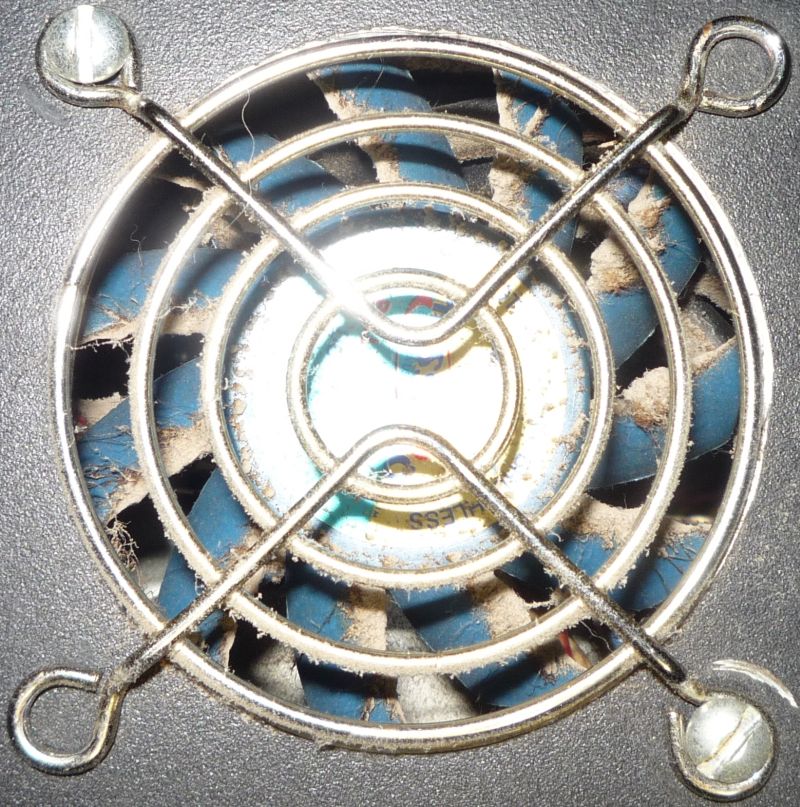
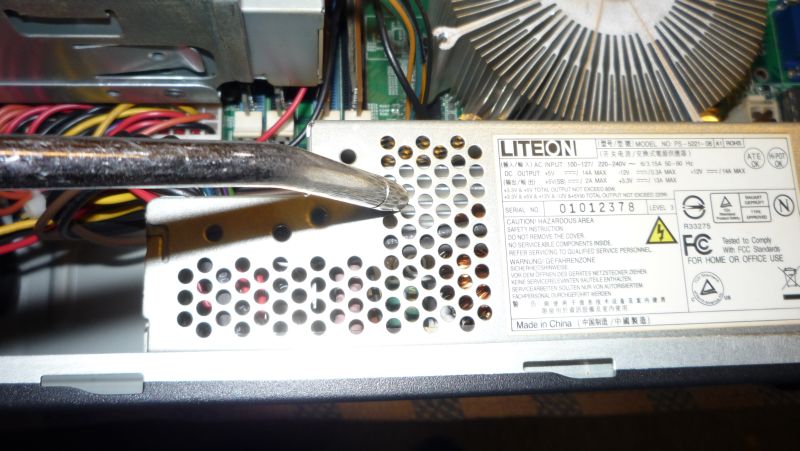
If the fan is behind a grille, like this power-supply fan, use short bursts of air so you don’t over-speed the fan. These little fans are meant to turn about 4000-5000 RPM, but can easily hit 15,000 with an air compressor. If the fan slings a blade, it’s history.
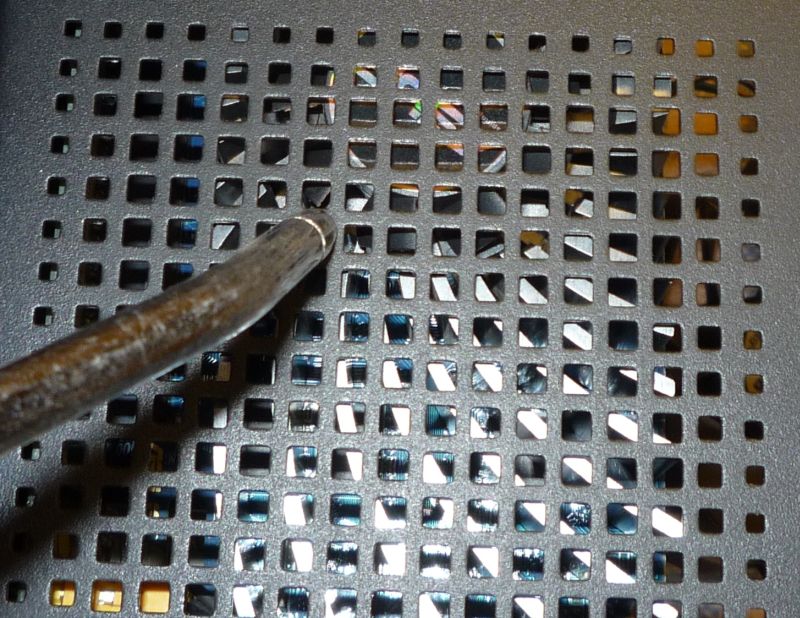
Make sure to blast any and all grilles where dust collects.
If you have an add-on video card, be sure to clean its fan and heat-sink. It’s a good idea to remove it from the computer for cleaning. And again, don’t over-speed the little fan. If the fine dust doesn’t come off the fan blades with compressed air, rub each side of each blade with a q-tip swab dampened with 409, then air-blast it again. This one cleaned up okay without removal.
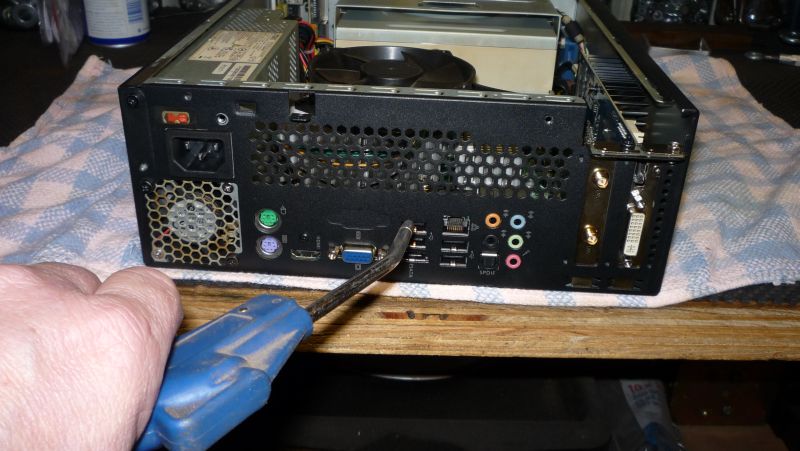
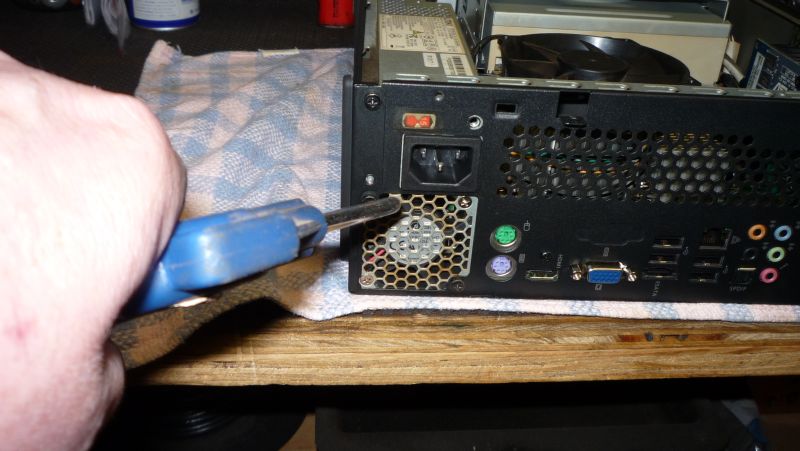
Make sure to clean all connectors, on the back…
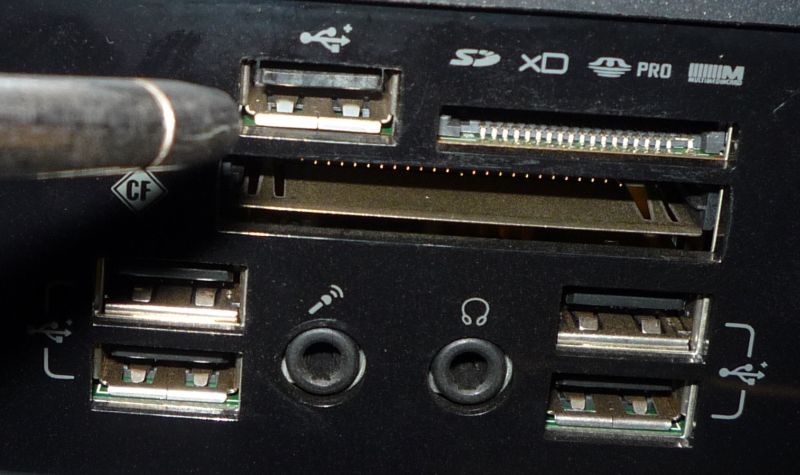
…and front.
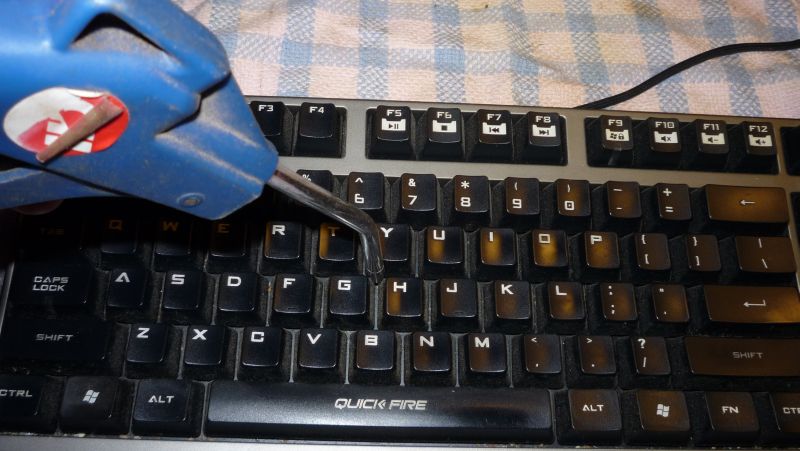
We might as well clean the keyboard, too. Note that just using air between the keys will not really clean out the keyboard, it will just move a lot of stuff around under the keys. The proper way to deep-clean a keyboard is to take its case apart, remove the keys, and detail it. See my article on Cleaning Keyboards. Be very careful cleaning laptop/notebook keyboards with air, as it is too easy to blow the keys right off.
After dislodging all the dust you can from fans, heat-sinks, jacks, and grilles, back off several inches and just blow out the whole computer case, every which way. Then take the computer back inside, let its temperature stabilize for a while to make sure of no condensation. Then put the fan back on the processor’s heat-sink, close up the case, and re-attach all the cables.
Conclusion
If you run a temperature sensor monitor program, you may not see any difference at idle, but the real difference will be seen when the computer is under a heavy load (transcoding a video or playing a 3D game) and it needs all the cooling that clean fans and heat-sinks can provide.
So there you have it! While your computer probably does not look like mine inside, the principles are the same. Dust will collect throughout the computer, but will be the heaviest, and potentially most damaging, around fans and heat-sinks. It’s a real good idea to get into the habit of cleaning your computer every six months. Also note that laptops need cleaning, which usually means removing the keyboard and blasting out the fan and the fins on the heat exchanger, which is located where you feel the hot air blowing out.
—KV5R